

Decal Mastery for Gunpla Builders: A Comprehensive Guide
How to Apply Decals To Your Gunpla
One of the most satisfying steps (and for some, the most daunting!) in creating your Gunpla masterpiece is applying those crisp, detailed decals. These tiny pieces can elevate the look of your Gundam model, giving it that professional and polished finish. But with various types of decals available - water transfer, dry rub, and stickers - how do you ensure a flawless application? Fear not! Here's a step-by-step guide for each type.
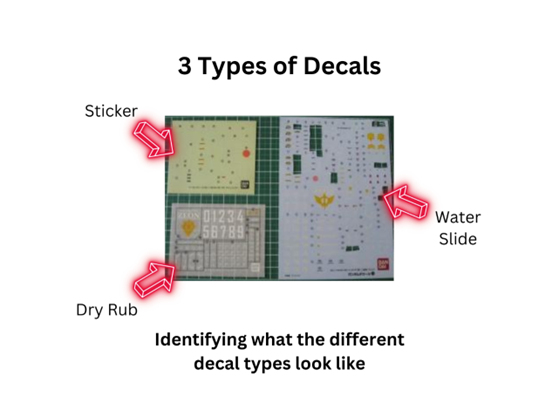
The 3 Types of Gundam Decals To Choose From
1. Water Transfer Decals, The Pro's Choice
- Preparation: -Ensure the surface of your Gunpla is clean. Some builders prefer a gloss coat before applying water slide decals as it provides a smoother surface and reduces the chance of 'silvering'.
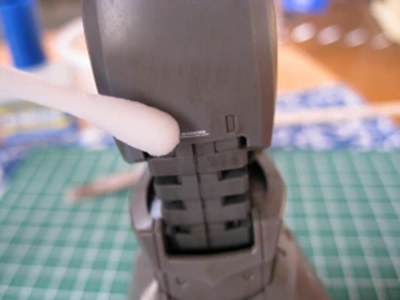
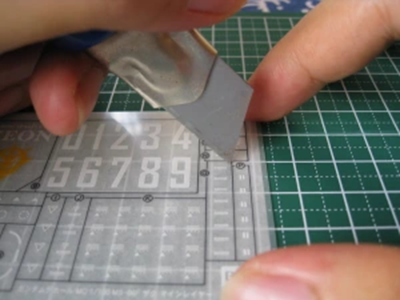
- Cutting:- Using sharp scissors or a hobby knife, carefully cut out the decal you want to apply.

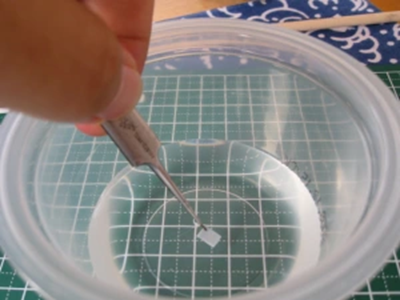
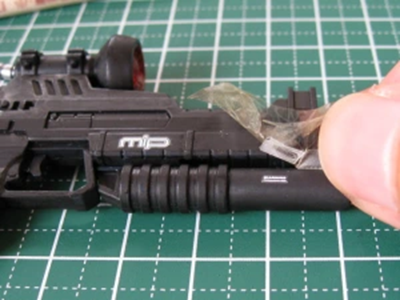
- Dipping:- Immerse the decal in water for about 20-30 seconds. You'll notice it starts to slide off the backing paper.
- Placement:- Using tweezers, gently slide the decal onto the desired location on your model.
- Adjusting:- With a cotton bud/swab, you can gently nudge the decal into the precise position.
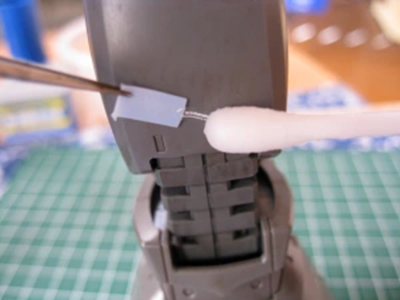
- Drying:- Once in place, use a soft cloth or cotton swab to press down and remove any excess water or air bubbles. Allow to dry for at least an hour.
- Sealing (optional):- After all decals are applied and dry, it's wise to seal them with a top coat to protect and give a uniform finish.
2. Dry Rub Decals, The Old School Method
- Cutting:- Cut out the decal as close to the design as possible.
- Positioning:- Place the decal on the desired area of your Gunpla.
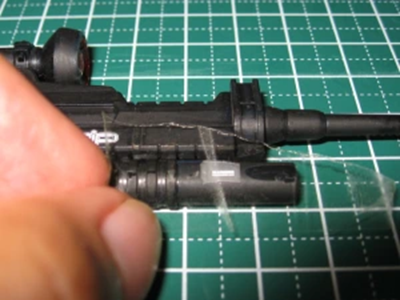
- Rubbing:- Using a blunt object (like a ballpen without ink or a stylus), rub the decal onto the model's surface. Apply even pressure to ensure complete transfer.
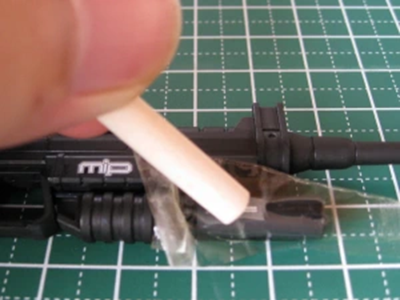
- Peeling:- Gently lift the transparent sheet. The decal should remain on the model. If parts haven't transferred, lay it back down and rub again.
3. Stickers, Quick and Convenient
- Peeling:- Using tweezers, gently peel the sticker from its backing.
- Placement:- Position it on your Gunpla. Since stickers have adhesive on the back, they'll stick upon contact.
- Smoothing:- Use a soft cloth or cotton swab to smooth out the sticker, ensuring no edges lift or air bubbles form.
Tips and Tricks To Applying Your Gundam Decals
- Always handle decals with tweezers to avoid oil or dirt from your fingers interfering with the adhesion.
- Patience is key! Especially with water slides, the urge to rush can lead to misalignment or tearing.
- A good top coat can help integrate stickers and make them appear more like painted-on details.
What is “Silvering”?
Mentioned earlier was the term “silvering” here’s what it means and how to avoid it.
Silvering refers to the visible imperfections that sometimes appear when applying decals to models, particularly with water slide decals. These imperfections manifest as tiny, trapped air bubbles or pockets of adhesive underneath the decal, causing a silvery, reflective appearance when viewed at certain angles.
Silvering is particularly noticeable on matte or flat paint finishes and can detract from the overall appearance of a finished model. It's an issue that modelers aim to prevent for a more professional and cleaner look on their models.
Steps to prevent silvering:-
- Surface Prep:- Applying decals over a gloss or semi-gloss surface can help because these surfaces are smoother than matte finishes, reducing the risk of trapped air.
- Use Decal Solutions:- There are setting solutions available that help decals conform to the surface, especially if it's uneven.
- Eliminate Air:- When applying the decal, use a soft brush or cotton swab to push out any trapped air bubbles from underneath the decal.
- Seal the Decal:- Once the decal is dry, sealing it with a clear coat can help protect it and further reduce the appearance of silvering.
What is the Decal Setter and Decal Softener mentioned?
Mr. Mark Setter and Mr. Mark Softer are two popular products by Gunze Sangyo (often referred to as GSI Creos) used to enhance the application and adherence of water slide decals on model kits, particularly Gunpla. There are of course many other brands in the marketplace that achieve the same results. Here's how to effectively use both products.
Using Mr. Mark Setter.
Mr. Mark Setter is essentially a setting solution that improves the adhesion of decals and helps them conform better to the model's surface.
- Preparation: Clean the surface of the model to ensure it's free of dust or oil.
- Application:
- Before applying your water slide decal, brush a small amount of Mr. Mark Setter onto the area where you'll be placing the decal.
- This preps the surface and makes it a bit tacky, helping the decal to adhere better.
- After immersing your decal in water and waiting for it to release from the backing paper, slide it onto the model where you applied the Setter.
- Gently adjust its position as needed.
- Use a soft cloth, cotton swab, or silicone brush to carefully press down on the decal, eliminating any air bubbles or excess liquid beneath it.
Using Mr. Mark Softer.
Mr. Mark Softer acts as a softening agent that makes decals more pliable, allowing them to conform better to textured or curved surfaces.
- After Applying the Decal:
- Once you've positioned your water slide decal on the model (and after using Mr. Mark Setter), allow it to sit for a moment.
- Carefully brush a small amount of Mr. Mark Softer over the top of the decal, especially if it's over a textured, uneven, or curved area.
- The decal will absorb the solution and become more pliable.
- As the decal softens, you can use a cotton swab or soft brush to gently press and conform the decal into panel lines, over rivets, or around curves to ensure its snug against the model's details.
- Allow ample time for the decal to dry and the Softer to evaporate. It's recommended to wait at least a few hours, but overnight is ideal.
Final Tips for using these types of products.
- Always handle decals with clean hands and modelling tools to prevent contamination.
- Use these solutions sparingly. A little goes a long way, and over-saturating a decal can damage it.
- After the decals have fully dried and set, it's a good idea to seal everything with a clear top coat to protect the decals and provide a consistent finish.
By effectively using Mr. Mark Setter and Mr. Mark Softer, modelers can achieve a more professional appearance with their decals, ensuring they look painted-on rather than just applied.
In conclusion, applying decals, be it water transfer, dry rub, or stickers, is a skill every Gunpla builder should master. It might seem tricky at first, but with practice, you'll be decking out your Gunpla like a pro in no time. Happy building, and may your Gundams always shine on the shelf!
Acknowledgment:- Thanks to Kusakusa for the use of the images used in this blog post.